2Wire - Generic Guide 2 (All Models) (v6 Firmware)

Port Forwarding Guide
For automatic port forwarding try Simple Port Forwarding
Step 1.
This router/modem forwards based on computer name and not ip address. So
there
is no need to set a static ip.
Some routers & modems work best with port forwarding if you have a static
local IP.
Manually set your network interface card ( NIC ) to use a static ip address.
You can also download
my FREE Simple Static IP tool to set it for you.
Step 2.
Open your favorite web browser and input your routers ip address in the address bar.
Please note that you must have the http:// in order to connect to your
router/modem properly.
Need help finding you router IP address? Click here

Step 3.
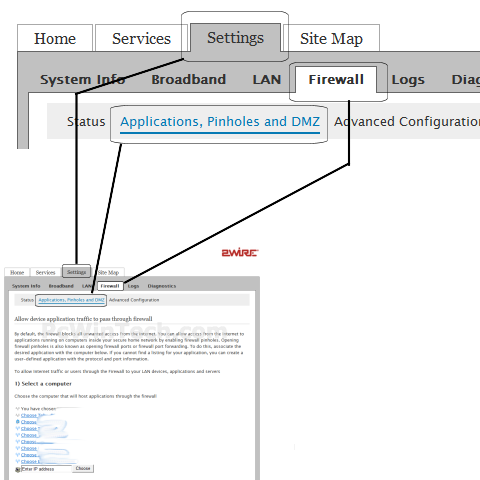
Once logged into your router click on the "Settings" tab.
After the page has loaded click on "Firewall".
And again, once the page is loaded click on "Applications, Pinholes, and DMZ".
Step 4.
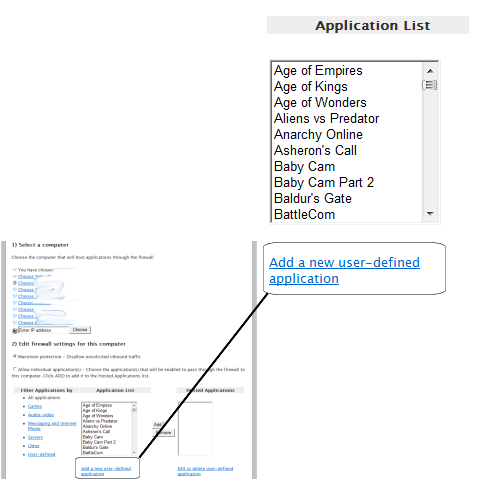
Once the page is loaded click on 'Add a new user-defined application'.
Step 5.
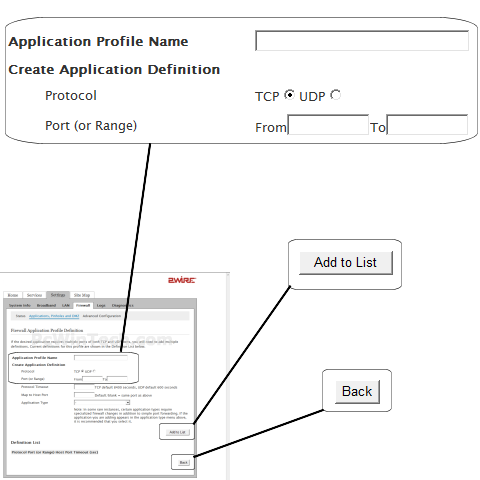
For 'Application Name' give this entry a name.
For 'Protocol' Choose 'TCP' or 'UDP' depending on which you need to use.
For 'Port (or Range)' in 'From' & 'To' enter the ports to be forwarded.
Example: 2100 to 2200 or 3000 to 3000
For 'Protocol Timeout (seconds)' & 'Map to Host Port' & 'Application Type' you can leave these all at their default values.
Click 'Add To List'
Repeat this step for all ports.
Once you have entered all the ports for this entry click 'Back'
Step 6.
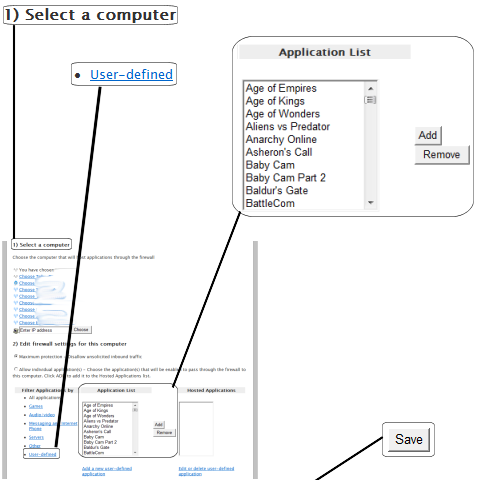
For 'Select a computer' choose the computer name to forward the ports to, or you can enter and IP address manually.
Choose 'Allow individual applications'
Choose 'User-defined'.
In the list on the left choose the entry you created and then click 'Add'
Repeat this step for each entry you need to add.
Once you are all done click 'Save'
All done!


