2Wire - 2701HGV-W (BigPond Firmware)
Port Forwarding Guide
For automatic port forwarding try Simple Port Forwarding
Step 1.
Some routers & modems work best with port forwarding if you have a static
local IP.
Manually set your network interface card ( NIC ) to use a static ip address.
You can also download
my FREE Simple Static IP tool to set it for you.
Step 2.
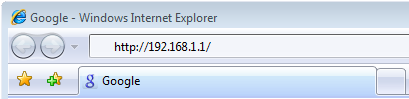
Open your favorite web browser and input your routers ip address in the address bar.
Please note that you must have the http:// in order to connect to your
router/modem properly.
Need help finding you router IP address?
Click here
Step 3.
Once logged into the router, click the 'Firewall' icon at the top of the page.
After the page loads click on 'Firewall Settings' link
_1.png)
Click to View Full Picture
Step 4.
After the page is loaded click on 'Add a new user-defined application'.
_2.png)
Click To View Full Picture
Step 5
For 'Application Name' give your entry a name.
Select which 'Protocol' you wish to use.
For 'Port (or range)' put the port range or single port in.
Ex- From: 3000 to: 3300 For a range OR From: 3300 To: 3300 for a single port.
For 'Protocol Timeout' using the default values will work.
For 'Map to Host Port' using the default will work.
Click the 'ADD DEFINITION' button to save the new rule.
Now click the 'Back' Button.
_3.png)
Click To View Full Picture
Step 6
Now select the computer name from the drop down list you want to forward the port to.
Select the 'Allow individual application(s)' option.
In the left side box find the name of the rule you just created and select it and click 'Add'.
The box on the right lists enabled rules for a computer.
After all the Application rules are added you can save by clicking the 'Done' button.
_5.png)
Click to View Full Picture
All Done!
_00.png)
_02.png)
_05.png)
_04.png)
_00.png)
_02.png)
_04.png)
_01.png)
_03.png)
_01.png)
_03.png)
_02.png)
_03.png)
_04.png)
_sm.png)
_1.png)
_2.png)
_001.png)
_004.png)
_003.png)


