Linksys - AM300 (Linksys Firmware)
Port Forwarding Guide
For automatic port forwarding try Simple Port Forwarding
Step 1.
Some routers & modems work best with port forwarding if you have a static
local IP.
Manually set your network interface card ( NIC ) to use a static ip address.
You can also download
my FREE Simple Static IP tool to set it for you.
Step 2.
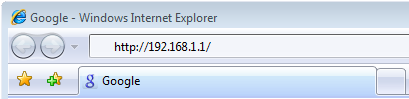
Open your favorite web browser and input your routers ip address in the address bar.
Please note that you must have the http:// in order to connect to your
router/modem properly.
Need help finding you router IP address?
Click here
Step 3.
Some router/modems require a username and/or password, if yours requires it,
enter the routers username and password here.
If you have changed it and don't remember it you may have to reset your device to factory default
using the reset button on most routers.
001.png)
Step 4.
Once logged into your router click on "Applications & Gaming"
Once the page has loaded click on "Port Range Forwarding"
003.png)
Click To View Full Picture
Step 5.
First give your entry a name under "Application"
Next for "Start" enter in the starting port you would like to
forward.
Example: 3300
For "End" enter in the ending port you would like to forward.
Example: 4300
Choose the "Protocol" you want to use.
Enter the computers IP address in "IP Address"
Be sure to check "Enable"
Repeat step 5 for any more ports you want to forward.
Click on "Save Settings"
All Done!
004.png)
Click To View Full Picture


/NetGear%20-%20WGR614%20v8%20(NetGear%20Firmware)002.png)
/NetGear%20-%20WGR614%20v8%20(NetGear%20Firmware)003.png)
/NetGear%20-%20RP614%20v4%20(NetGear%20Firmware)002.png)
/NetGear%20-%20RP614%20v4%20(NetGear%20Firmware)003.png)
002.png)
003.png)
/Belkin%20-%20F5D7230-4%20v2%20(Belkin%20Firmware)001.png)
/Belkin%20-%20F5D7230-4%20v2%20(Belkin%20Firmware)002.png)
/Beetel%20-%20110BX1%20(Beetel%20Firmware)001.png)
/Beetel%20-%20110BX1%20(Beetel%20Firmware)003.png)
-02.png)
-03.png)